A teletype uses a current loop where a current (20ma or 60ma) is called a MARK and the absence of current is a SPACE condition. When a line is idle, it delivers a steady MARK signal.I held the selector magnet armature in the MARK position and rotated the motor by hand until the printer cleared the prior selected character and all the clutches unlatched. In this condition, the motor spins without any printing action taking place.
If the line is disconnected (e.g. the armature is in the up or SPACE position) then the mechanism detects the space as a start bit and latches the selector clutch to take a cycle decoding what it believes is an incoming character. Since the magnet stays in the SPACE condition, all eight bits of the character are interpreted as 0, which is the "blank" character.
A blank causes the printer to partially print, but the hammer does not actually strike a character. This is the chattering that a teletype will make when the line is disconnected A blank is different from a "space" character which advances the carrier one column to the right, although both of them cause the partial movement of the hammer called a non-print.
 |
| Selector clutch to convert serial input to parallel codebars |
 |
| Push levers for each of the incoming bits |
 |
| Blocking levers above, codebars below at right angles |
If the ASCII encodes a function request such as line feed, the machine establishes a non-print condition to block the hammer from hitting the type cylinder, but also causes a function bar for the requested function to drop into a slot and trigger the function clutch. That would move other bars and levers to cause the printer to feed a line, return the carrier, ring the bell, or other implemented function.
 |
| Codebar, function and printing clutches |
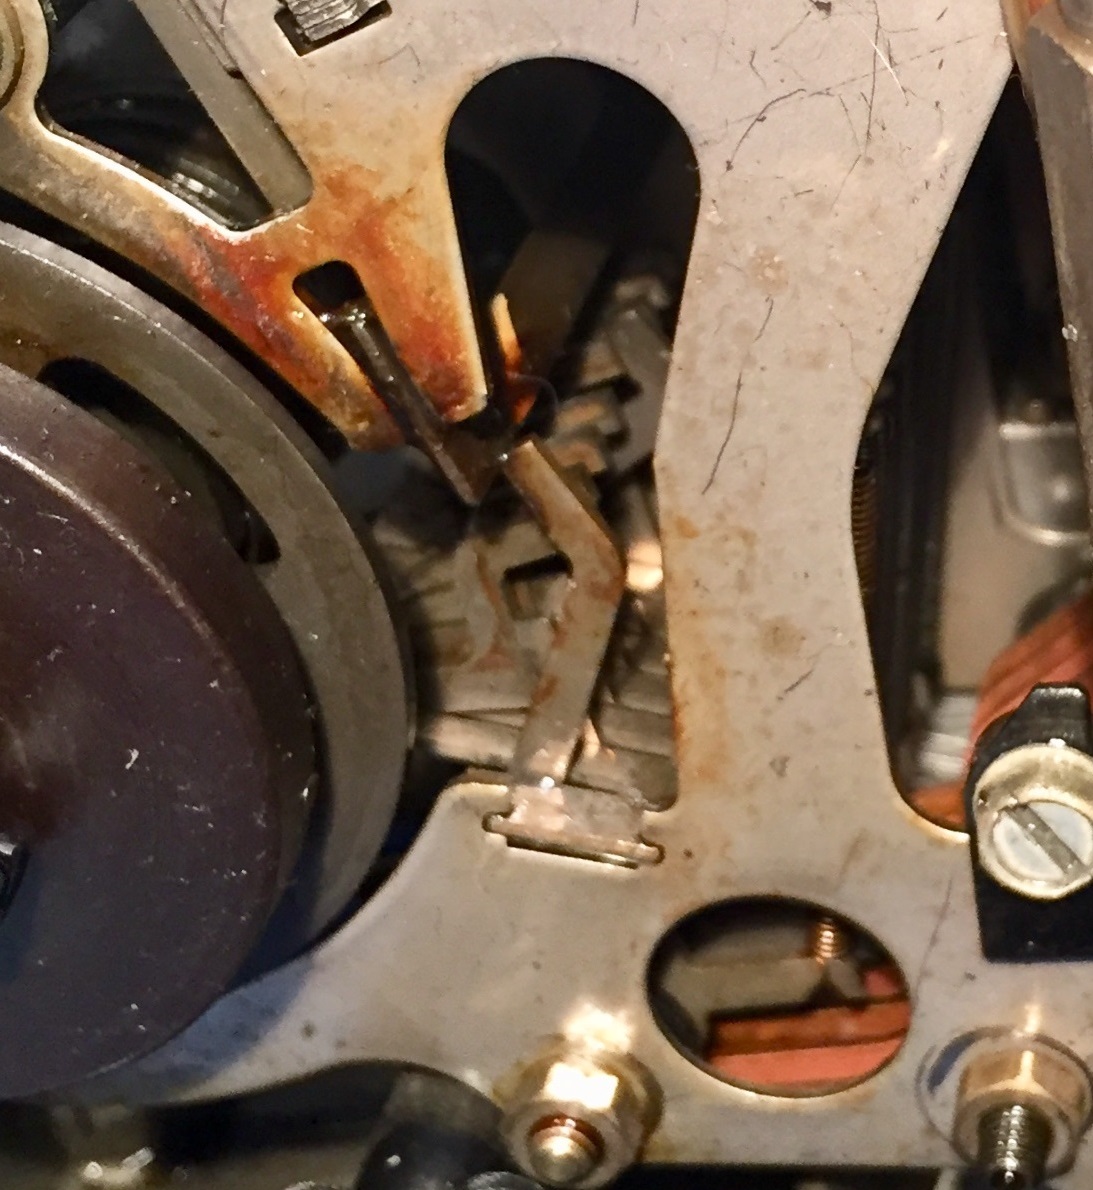
However, I can see that the selector mechanism sets up the 'blocking arms' correctly for the MARK and SPACE bits of the incoming character, but it should then trigger the code block mechanism to move the code bars left or right depending on their received value. This is not occurring. With the code bars stuck in their off position, every incoming character appears to be a NULL/Blank.
I did a bit of general cleaning, spraying alcohol to rise off dirt near parts that need oil, then applying fresh oil. I can see that the code bar and function clutches work properly, as does the selector clutch. Even the Answer-Back drum clutch works properly, cycling the drum through all the characters that are encoded on it by removing tabs then stopping.
One area that I had to focus on was the distributor - this is a unit that rotates once to serialize input that comes from the keyboard, the Answer-Back drum or the paper tape reader. It keeps turning, even when the Answer-Back drum is at its idle point. I have to figure out what needs to be lubricated and feed so that the distributor clutch also sits at a stop position until needed.
 |
| Who Are You drum to encode and send a string back to inquirer |
I tried to set up the first test character - an A - through hand cycling and use of a spring hook. Once I can get the code set up, I would trip the code bar cycle. The goal was to see the right combination on the code bars.
Getting the timing right on the selector cycle is important because the machine is designed to select the next character while the code bar cycle is configuring the print wheel or function rods. Thus, by the end of a cycle I think the character value is locked into position and I can't manipulate it.
I really don't know exactly where I am supposed to pull with the spring hook nor at what time precisely. Until I figure this out I can't fire off character codes and test the remainder of the printer unit.
I was cleaning the punch unit and found a broken bit which initially looked like a segment of a toothed wheel. That worried me because spare parts are difficult to find. After studying the parts manual I realized this was a projection onto which a spring is hooked; the projection had snapped off. This allows setting the tape guide pressure by moving the end of the spring to one of the grooves on the projection.
 |
| Broken part I discovered in punch unit |
 |
| Location where the projection broke off |
I never did figure out the technique with the spring hooks during the manual selector cycle, but I was able to toggle the selector magnet armature as I very, very slowly advanced the cycle. It gave me a few printable characters, allowing me to confirm that the hammer does slam the type cylinder into the ribbon and paper.
The last 3-4 tests I would like to accomplish is to trigger function operations instead of typing characters. I want to try out 'space', 'bell', 'line feed' and 'carrier return' as these exercise most of the rest of the printer mechanism. If they work, I think this unit will be ready for power-on testing after reassembly of the entire ASR 33.
What I discovered is that some of the code bars are too sticky to work reliably. I will continue to clean, reoil and exercise them until they work as they should. It is not yet ready to go, but I will keep at it tomorrow.
QUICK RS232 TO 20MA CURRENT LOOP INTERFACE FOR ASR 33
I whipped up a quick prototype board of a circuit to connect a regulation RS232 (+/- 12V) interface with the two 20ma current loop connections in an ASR 33 teletype. Four transistors, one diode and 9 resistors were soldered to a small board and made ready to wire up as needed to test the ASCII teletypes (model 33).
This will work well with various minicomputers and the Altairduino recreation of an Altair, but can also be used with PC based serial links as long as we insert a voltage translation board to seperate the TTL from the RS232 voltage levels.
For my Altairduino, I had constructed a box which connects over Bluetooth to the Altairduino and presents real RS232 - I used it with one of my HP minicomputer terminals. This will work fine with my teletype and the simple current loop interface. Might have to adapt to the connector I put on the bluetooth box.
No comments:
Post a Comment