TO ME THE MOST IMPORTANT ADJUSTMENT IS DETENT TIMING
In a print cycle, the whiffle tree applies tension (or relaxes tension for negative rotations) to the tilt and rotate system which turns and tilts the ball. The detent should be locking in those movements once they are complete. However, I have noticed that if the detent moves in while the rotate lever arm is still in motion because the cams are still pushing down on the selection bail, then the ball can be stopped before it rotates to its final position.
 |
| bottom shows jammed tilt |
Thus, once I have the tilt and rotate levers moving properly and the ball tilting and turning to the correct rough position, I just have to tweak the timing of the print shaft so that it does NOT activate the detents until the selection movement is complete.
RESULT OF ROTATE SELECTION OF CHARACTERS
I finished up the adjustments today and tried a number of different characters to test out the tilt and rotate behavior when hand-cycled. The check is a verification that all is now set up properly. It consists of selecting four characters and comparing where the detent occurs - it must be 'within .0015" of each other in the negative direction.' The characters are chosen to have a -5, a +5, a 0 and a -1 rotate. If this test is failed, we would have needed to iterate through the tests and adjustments until this works.
Everything locked in perfectly and detented at the correct place.
SHIFT MOTION ADJUSTMENT
The shift pivot arm on the right side of the typewriter adds enough pull to the tape to rotate the ball 180 degrees exactly to the 'upper case' hemisphere or relax it to go back to 'lower case'. The test is that the detent enters the tooth for a UC and LC -5 character at exactly the same point and it withdraws at exactly the same time in the cycle. If the UC is not the same, an adjustable stop screw is turned until we pass the test.
 |
| completely false diagram, the adjuster does not look like this |
The adjustment, like most on this bedeviled typewriter, was quite a bit off. The typewriter was selecting characters from the upper case side of the ball perfectly, but would miss the +5 column on the lower case side. There is a nut-head screw that determines the tension of the lower case position and it had to be adjusted.
Access was difficult, so I had to remove a couple of parts and fight because both the nut-head and the locking nut beneath it are thin - thinner than most wrenches which makes it difficult to hold one and turn the other.
 |
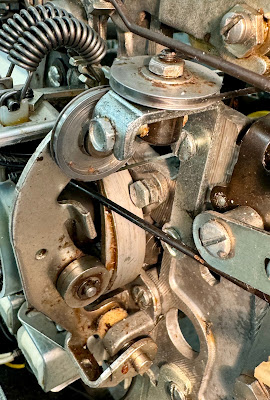
| Hex head bolt just under the black rod is the adjustment |
 |
| The bolt head is very thin and the lock nut is just behind it |
I was able to get it adjusted properly and then iterated back to test the selection in both upper and lower case. After another pass adjusting the print shaft timing, the machine was selecting very reliably.
FINAL CHECK
I also checked selection under motor power. First I stopped the ball with the Dynamic Half Cycle Tool when it had locked the ball in place, allowing me to visually confirm the character. Later I let a few characters type through a ribbon onto paper on the platen which is the ultimate test.
PLATEN ADJUSTMENTS
What was typed on the paper was inspected to insure that the top and bottoms of the letter were equally dark. The solution if not is to move the platen up or down with side adjustments until the print is perfect. Fortunately this was good as it stands.
RIBBON COLOR SHIFT ADJUSTED
I tweaked the tension of the ribbon color string so that the type comes out in red or black as we activate the Shift to Red and Shift to Black solenoids. This requires the special dual color ribbon, which can be acquired various ways.
 |
| Type changed from black to red with solenoid activation |
A ribbon manufacturer makes new versions of this in Germany, but between the cost of the ribbon and the cost of shipping, a single ribbon is about $100 delivered here. From time to time you can find new-old stock ribbons and so far every one I have tried was not dried out. Finally, there are suppliers of the right width of dual color ribbon, thus presumably you can buy this, open the stale cartridge and put in the new ribbon.

No comments:
Post a Comment